728x90
css 배우기 전에 html 만으로 만들었던 나무위키 목록표에 css를 적용시켜봤다.
https://blog.naver.com/smoothbutterfresh/223134426826
#코딩기록4_[html] 나무위키st 목록표 만들어보기
나무위키에 들어가면 보기쉽게 작성된 목록표를 구현해보고자 도전 ..! (아직 HTML만 배운 상태로 하는...
blog.naver.com
짠 ,, 나무위키st 목차에 css를 적용시켜봤다.
★
- a 태그에 기본으로 적용되어있던 (링크 사용 시) 밑줄을 제거함.
ㄴtext-decoration-line: underline;
링크가 연결된 파란글씨를 클릭하면 해당 본문의 부분으로 연결된다.
사용된 CSS 코드들
<style>
    @import url('https://fonts.googleapis.com/css2?family=Nanum+Gothic&display=swap');

    h1{
        text-align: center;
    }
    .a{
        width: 400px;
        height: 350px;
        border:1px solid black;
        padding-top: 20px;
        padding-bottom: 20px;
        font-family: 'Nanum Gothic';
        font-size: 16px;
        line-height: 23px;
    }
    a{
        text-decoration-line: none;
    }
    a:hover{
        text-decoration-line: underline;
    }
    .b{
        width: 400px;
        height: 350px;
        border:1px solid black;
        font-family:'Nanum Gothic';
    }
    img{
        width: 180px;
        height: 180px;
        margin-bottom: 10px;
        margin:auto;
        display: block;
    }
    th{
        border: 1px solid black;
        width: 80px;
        background-color: antiquewhite;
    }
    td{
        border: 1px solid black;
        width: 335px;
    }

</style>
HTML 코드들
<body>
<div>
<fieldset class="a">
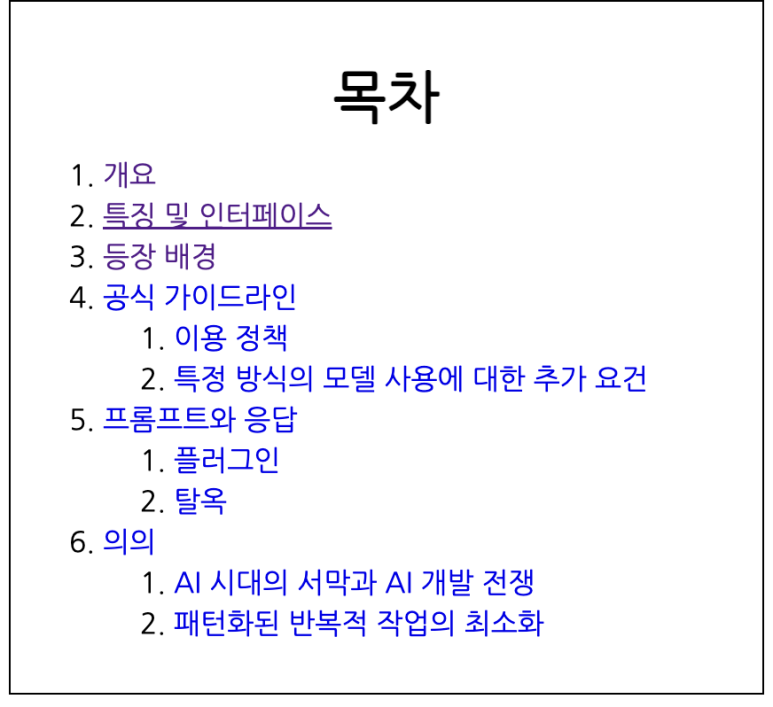
<h1>목차</h1>
<ol>
<li>
<a href="https://namu.wiki/w/ChatGPT#s-1">개요</a>
</li>
<li>
<a href="https://namu.wiki/w/ChatGPT#s-2">특징 및 인터페이스</a>
</li>
<li>
<a href="https://namu.wiki/w/ChatGPT#s-3">등장 배경</a>
</li>
<li>
<a href="https://namu.wiki/w/ChatGPT#s-4">공식 가이드라인</a>
<ol>
<li>
<a href="https://namu.wiki/w/ChatGPT#s-4.1">이용 정책</a>
</li>
<li>
<a href="https://namu.wiki/w/ChatGPT#s-4.2">특정 방식의 모델 사용에 대한 추가 요건</a>
</li>
</ol>
</li>
<li>
<a href="https://namu.wiki/w/ChatGPT#s-5">프롬프트와 응답</a>
<ol>
<li>
<a href="https://namu.wiki/w/ChatGPT#s-5.1">플러그인</a>
</li>
<li>
<a href="https://namu.wiki/w/ChatGPT#s-5.2">탈옥</a>
</li>
</ol>
</li>
<li>
<a href="https://namu.wiki/w/ChatGPT#s-6">의의</a>
<ol>
<li>
<a href="https://namu.wiki/w/ChatGPT#s-6.1">AI 시대의 서막과 AI 개발 전쟁</a>
</li>
<li>
<a href="https://namu.wiki/w/ChatGPT#s-6.2">패턴화된 반복적 작업의 최소화</a>
</li>
</ol>
</li>
</ol>
</div>
</fieldset><br>
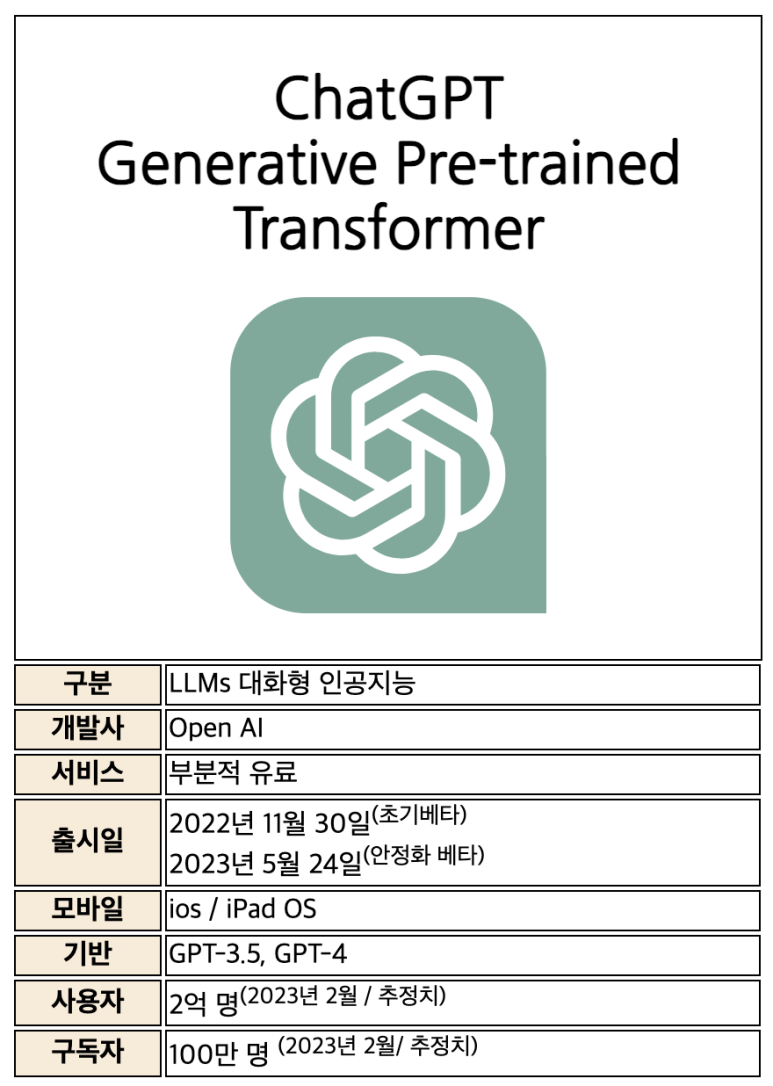
<table>
<fieldset class="b">
<h1>ChatGPT<br>
Generative Pre-trained Transformer</h1>
<div>
<img src="./imgg/gpt.svg" alt="gpt pic">
</div>
<tr>
<th>구분</th>
<td>LLMs 대화형 인공지능</td>
</tr>
<tr>
<th>개발사</th>
<td>Open AI</td>
</tr>
<tr>
<th>서비스</th>
<td>부분적 유료</td>
</tr>
<tr>
<th>출시일</th>
<td>2022년 11월 30일<sup>(초기베타)</sup><br>
2023년 5월 24일<sup>(안정화 베타)</sup></td>
</tr>
<tr>
<th>모바일</th>
<td>ios / iPad OS</td>
</tr>
<tr>
<th>기반</th>
<td>GPT-3.5, GPT-4</td>
</tr>
<tr>
<th>사용자</th>
<td>2억 명<sup>(2023년 2월 / 추정치)</sup></td>
</tr>
<tr>
<th>구독자</th>
<td>100만 명 <sup>(2023년 2월/ 추정치)</sup></td>
</tr>
</table>
</fieldset>
</body>
+ 그리고 나무위키 들어가서 보면서 따라만들다 보니 이런 표도 있길래 만들어보고 싶어졌다...
그래서 지금까지 배운걸 토대로 최대한 따라 만들어봤다 ..ㅎ
아직은 뭔가 허접한 ...ㅎㅎ^^
728x90
'💡Language > CSS' 카테고리의 다른 글
| 이미지 그리드 / CSS Grid (0) | 2024.01.07 |
|---|---|
| 레이아웃 설계(1차원/ flexbox layout ) (1) | 2024.01.07 |
| 웹 로그인 창에 css 적용시켜보기 (0) | 2024.01.07 |
| 메모 웹 만들어보기 (0) | 2024.01.07 |
| 변형 효과 /transform, transform-origin 속성 (0) | 2024.01.07 |


